Friday, January 28, 2011

Demolition in cramped quarters


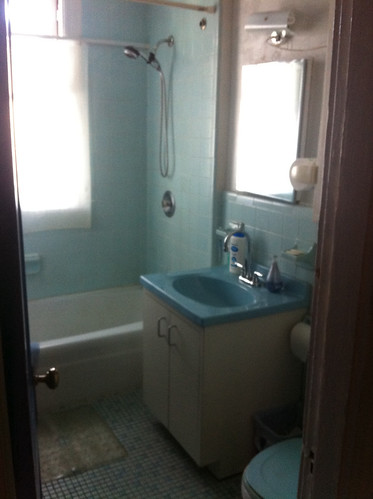
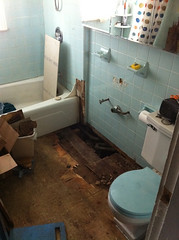
Demolition isn't turning out at all like those DIY shows (to which I am addicted, by the way). You know the ones... a team comes in and they rip out the bathroom in a few hours. We could probably do that if we had a big house and could block off the area with the bathroom. But we live in an apartment, on the second story, so our demolition is taking a more calculated form.

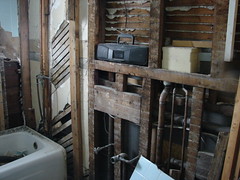
Today was my day off from work, but not Rob's. I needed to figure out a way to get the most done while no kids were at home, so I grabbed my respirator and got to work pulling down plaster. I came up with this system for moving the demolition debris out. This bin, when filled with crumbled plaster, tile, etc. is just about the most I can dead lift from the ground. So I fill it up, drag it down the long hall (over some towels to help control dust), and bring it out to the front porch.


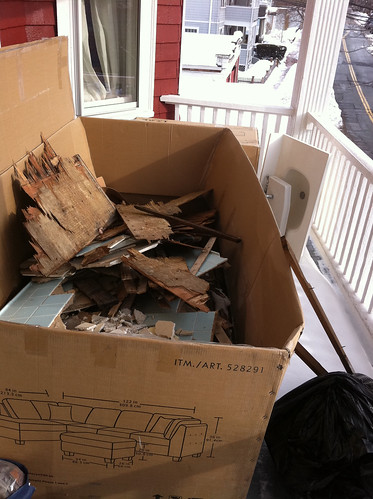
It's not like I can just throw it off though. Our tiny front yard is completely full of snow right now, and even if it weren't that would be a huge mess. So instead I am using the giant box our new sofa came in. I knew there was a reason we hadn't dragged it to the street yet! Voila! Makeshift dumpster. I drag the debris out and throw it in this box. When we are done we'll get a bagster and put that in the yard, fill it up, and have it hauled away.

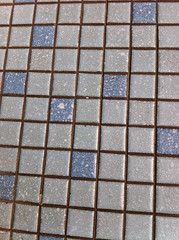
In all this destruction, we are saving some of the old blue tile. We still have two bathrooms with it after all, and they are also showing their age. The specialty pieces like bullnose and baseboard are hard to come by, and the field tiles are a non-standard size now. Actually, the dimensions are all different now.

We carefully removed all the accessory pieces (TP holder, soap dish, toothbrush/cup holder, and towel rack ends) and they are in perfect condition. Think there's a market for vintage baby blue ceramic tile on eBay?

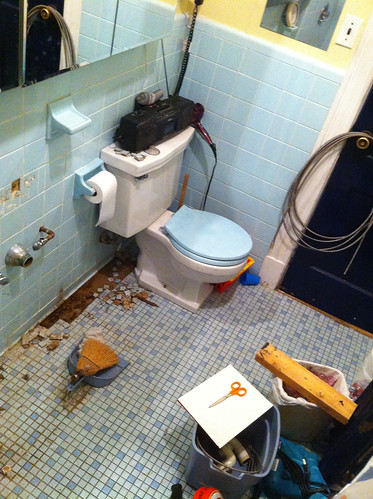
Overall, today was productive. All the plaster and lath is off the wall up to shoulder height, except for over the tub. That section is being stubborn so I need Rob to help me. Then we get on ladders and work our way up to the 9 ft. high ceiling.


I can't wait to see what's going on up in there.

Thursday, January 27, 2011

Stop everything! Let's renovate the bathroom!

It all started so innocently, as I suspect many renovations do, but soon we found ourselves in the land of "might as well". Now we're doing a gut renovation in the bathroom of our New England triple decker, built in 1922. Want to join me for the ride? I'm sure there will be fun (nightmarish) surprises along the way.


First, a look at what our bathroom used to look like. Now, this is actually the twin of our bathroom, located on the first floor of our house. We had the sink out and the floor up in ours before I thought to take out the camera. Luckily there are (were) three nearly identical bathrooms in the house.

The bathrooms were remodeled in August of 1954. How do we know? That was the date on the newspaper we found in the wall. Notice the baby blue tile in the tub surround? It continues around the wall on all sides. There are built in towel racks, soap dish, toothpaste, and tp holders. They are cool and vintage, but they do limit the placement of things like sinks and vanites.

50s mosaic tile

Here's the tile pattern that was on the floor. I don't have anything against mosaic, but that grout never seemed clean, and the pattern on the floor is very busy. We're told that a larger tile pattern makes a room feel bigger, and this room needs all the help it can get.

We have tile picked out that we think we'll use. It's a combination of 12x12" field tiles with smaller accent tiles and blue mosaic glass tiles.


Uh oh, it's not just a few loose tiles
So we'd been struggling with a slow drain in our tub off and on for years. We (and by "we" I mean Rob) have snaked it a couple of times a year, but this last time that did no good. We decided that since our old particle board vanity was disintegrating anyway, we'd take that off the wall and try to snake through the sink drain. That worked, and since we had the vanity out I thought we should repair the loose tiles on the floor. Well, removal of those tiles revealed dreaded rot in the sub-floor, and it turns out most of the tile wasn't even stuck down anymore. They came up like cookies on a cookie sheet! When you can basically rake the floor and the tile comes up, somethin' ain't right.


hole in the floor
Before we knew it, the tile was up, exposing the rotting subfloor. It had been screwed down to en existing hard wood (!) floor. Unfortunately, those had rot too from years of neglect and water damage. When we pulled them up, we discovered a giant hole in the floor! When the plumbing for the tub and 50s sink was put in, a whole bunch of floor joists were notched and floor boards were removed to accommodate the weird plumbing.

At that point, we were thinking we'd just replace the floor, sink and vanity. And the toilet. And while we're at it, the tub is in really bad shape. Here we go, let the might as well's begin! We pulled off some loose tiles from the wall and lo and behold we found mold. Great. You don't want to see the mold though, right? Because I took a picture of it. It's gross, trust me. So while the vintage tile is cool, mold is not. Nor is horsehair plaster that's no longer connected to the lath and is bowing in some places and buckling in others. After some reading up on bathroom remodels and a visit to Ikea to price bathroom stuff we realized that we have to go for it.

DSC07801

Once we made the final decision to gut the bathroom, demolition began. Yes, demolition is fun. It's easier when you don't need to be careful. It's hot and messy when you are taking down old plaster. But it's also cool because we are learning interesting things about the house and uncovering some neat details. More on that to come.